If you’re considering dental implants, this article walks you through the exact steps in dental implant placement so you know what to expect from the first visit to the final crown. You’ll learn the typical timeline, comfort and sedation options, common preparatory procedures, and realistic outcomes. Use this guide to set expectations for time, cost, and recovery, and to prepare questions for your implant team.
Why knowing the steps in dental implant placement matters
Understanding the process reduces anxiety and helps you plan time off work, travel, and finances. It also makes it easier to compare treatment plans and ask informed questions about risks and alternatives.
Typical timeline overview:
- Consultation and imaging: 1 visit
- Any preparatory work (extractions, grafts): 1–6 months of healing depending on needs
- Implant surgery: same-day appointment for placement
- Osseointegration (healing): usually 3–6 months
- Abutment and final restoration: 1–2 visits
Step 1: Consultation and digital treatment planning
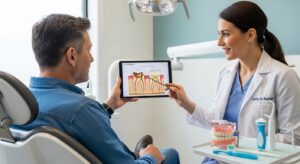
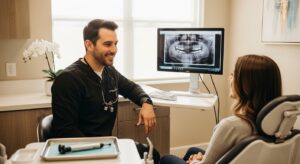
Your first visit focuses on a full health and dental review, your smile goals, and a detailed exam. Expect questions about medical history, medications, and past dental work. The dentist will check gum health, existing teeth, and bite.
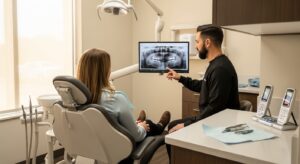
Advanced imaging is standard: a CBCT scan and panoramic X-ray give a 3D view of bone, nerves, and sinuses. Digital impressions with Primescan create accurate models for planning and final restorations. With these tools, your surgical team can map ideal implant positions and predict if grafting is needed.
At this visit you’ll review treatment options, timeline, costs, risks, and benefits. You’ll receive a clear plan and sign informed consent once you understand the proposed steps.
Step 2: Preparatory procedures (if needed)
Some patients need preparatory work before implants. Common procedures include:
- Tooth extraction — removing damaged or unsalvageable teeth.
- Bone grafting — rebuilding bone where it’s thin to support implants.
- Sinus lift — raising the sinus floor to create space for upper implants.
Healing times vary: simple extractions may heal in a few weeks, while bone grafts can need several months. Your dentist will give a personalized schedule based on the procedure and your healing response.
Minimally invasive soft-tissue options, like Blue Wave Laser therapy, can reduce bleeding, pain, and swelling and often speed recovery compared with traditional cuts and stitches.
Step 3: Implant placement surgery — what to expect
The implant surgery appointment is typically a few hours. You can choose comfort options ranging from local anesthesia to nitrous oxide or IV sedation for deeper relaxation. Your team will review pre-op instructions before starting.
Guided implant surgery improves accuracy and safety. Technologies like X-Nav and 3D-printed surgical guides help place implants in the exact planned position. This reduces surgical time and risk to nearby nerves or sinuses.
During surgery you may feel pressure but not sharp pain. IV sedation or local anesthetic keeps you comfortable. After surgery, you’ll get clear same-day instructions about pain control, diet, oral hygiene, and emergency contact details.
Step 4: Healing, abutment placement, and the final restoration
After implant placement, osseointegration — the process where bone bonds to the implant — takes about 3–6 months for most patients. Your dentist will monitor healing with follow-up visits and imaging.
When the implant has integrated, an abutment is attached. Sometimes the abutment is placed at the same time as the implant; other times it’s a separate visit. Temporary crowns or bridges can be provided so you have function and aesthetics during healing.
The final prosthesis workflow is digital: Primescan impressions capture precise details, and in-house Primeprint 3D printing can produce custom restorations and surgical guides quickly. Expect a try-in and small adjustments before delivery. The day of the final restoration usually takes one to two hours, depending on adjustments and the number of teeth being restored.
Aftercare, follow-up, and choosing the right implant team
Home care after implants includes gentle cleaning around the implant, a soft diet for the first days, and following prescribed medications. Long-term maintenance means regular dental cleanings, routine exams, and protecting restorations with night guards if you grind your teeth.
Watch for signs that need urgent attention: increasing pain, swelling that worsens after 72 hours, fever, or implants that feel loose. Report these to your dentist right away.
When choosing an implant team, look for proven technology and experience. HAR Dental Group focuses on accurate, modern implant care using CBCT, X-Nav guided surgery, Primescan digital impressions, and in-house 3D printing for better fit and faster turnaround. Dr. Omar Harmouche, DMD, leads the team with national recognition in full-mouth restorations and IV sedation, prioritizing safety and patient comfort.
To make appointments productive, bring a current medication list, recent imaging or dental records if available, insurance details, and a list of questions or goals. Clear communication helps your team tailor the best plan for your needs.